Arcade Türü Oyun Programlamayıve Bilgisayar Bilimleri Öğrenin
Version Control
4.1 What is Version Control?
No serious development should be done without version control. In fact, version control is so important, many developers would argue that almost no development should be done without version control.
Version control allows developers to:
- Get any prior version of a program (Worried a change will mess up the program? Worry no more!)
- Easily share code between developers
- Easily work independently of other developers
- Know exactly what changed in the code, when, and by who
- Recover an accidentally deleted or overwritten file
- Go back and create a bug-fix on prior versions of a program
- Work on multiple computers and keep files in sync
Version control saves untold time and headaches. It used to be that version control had enough of a learning curve that some developers refused to use it. Thankfully today's version control tools are so easy to use there's no excuse not to.
There are two main types of version control. The original version control systems were “centralized.” Subversion (SVN) is a very popular piece of software that supports this type of version control. The other type is a “Distributed Version Control Systems” (DVCS). There are two popular versions of DVCS in use today, Git and Mercurial. Either works fine, but for this tutorial we will standardize on Mercurial. Mercurial is sometimes also known as Hg. Get it? Hg is the symbol for Mercury. We programmers are a hilarious bunch.
If you are taking this as part of a Simpson College class with Dr. Craven, all the programs you write will be turned into grade using the Mercurial version control system. Even your worksheets will be turned in this way.
4.2 Software Needed
Changes that you and other developers make to the code are stored in “code repositories.”
Just like the web can be browsed with different web browsers, Mercurial code repositories can be browsed with different clients. We'll use a client called SourceTree.
Download SourceTree from:
You can also follow along with the video tutorial to the right.
4.3 Forking Repositories
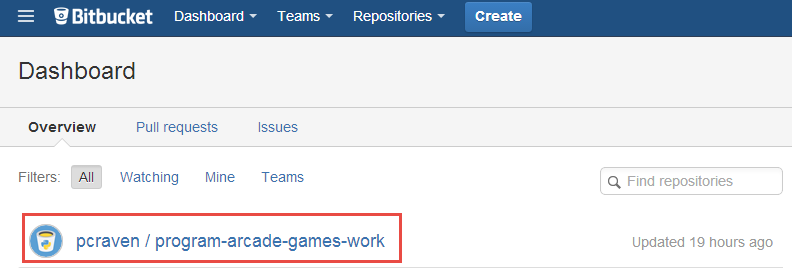
We'll start this class with a code repository that has already been created. The code is currently hosted on a website callded “BitBucket.” Go to BitBucket and sign up:
Once you have signed up, go to the code repository that I've created:
bitbucket.org/pcraven/program-arcade-games-work
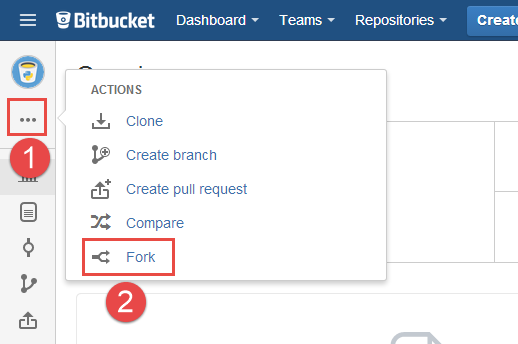
The next step is to create your own copy of my repository so that you can
change it however you like. Your copy will be called a “fork” of my
original code. So click the “Fork” button:
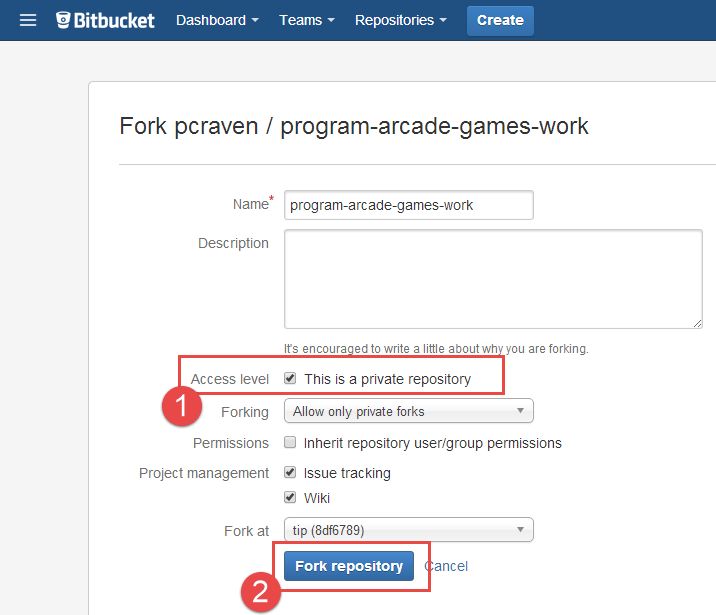
BitBucket will ask for details about the fork. You can set your own name for the fork
or use the same name. But I highly recommend making the fork private! Otherwise anyone
can copy and look at your code. If someone copies your code they aren't learning anything
and that's not good. See below for the settings I recommend:
4.4 Cloning Repositories
Now we need to tell SourceTree to clone the repository. Sometimes this can
be done from the web by selecting the following:
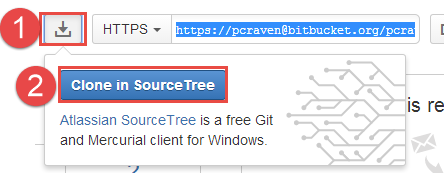
If that doesn't work, copy the web address for this repository:
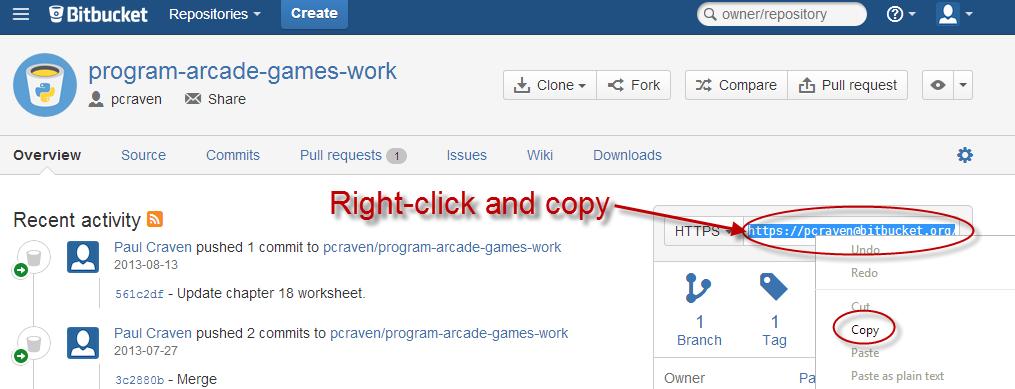
If cloning from the web worked you should be at the “clone” dialog box. If
you are using the copy/paste method then start SourceTree and hit the Clone button.
Then set up an empty folder to put your files in.
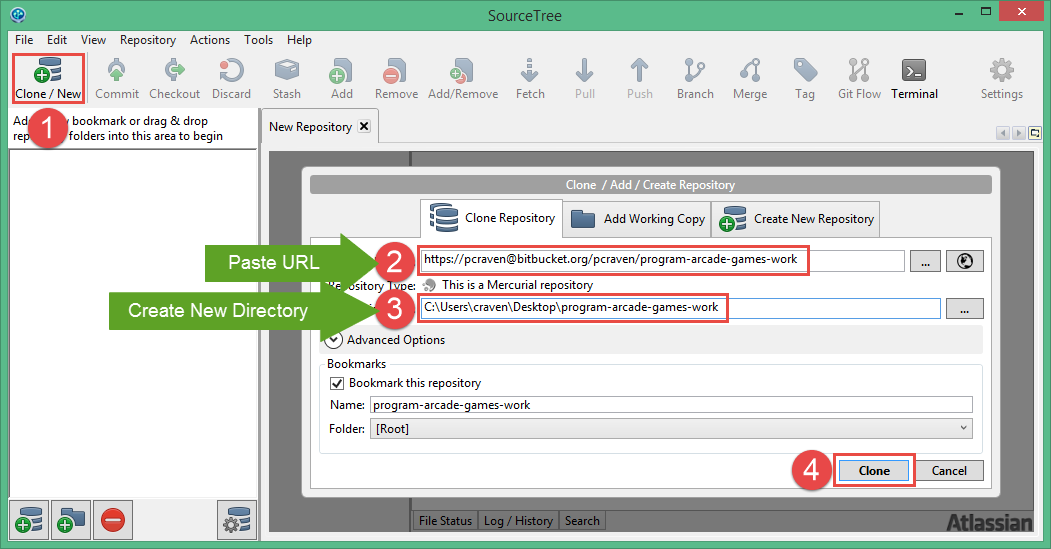
Before it can start, it may ask you to enter your repository user name and password.

You can now open up this folder and edit the files like normal.
4.5 Committing Changes
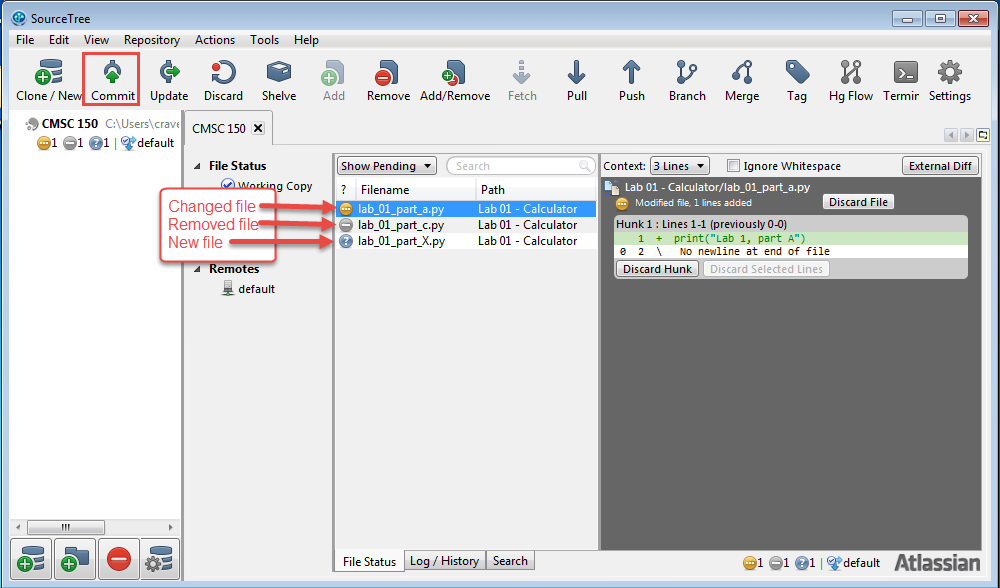
When you have finished making a change, you can commit it to the code repository. Don't worry! The great thing about this type of commitment, is that you can go back on any “commit” that you make. Going back on a commitment is a feature with this software! How cool is that?
In the example below, I have changed the first file, deleted the second file,
and added a third file. Notice how the icon is different. On the right side you can
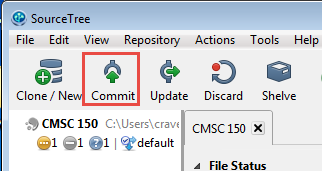
see exactly what was changed. To commit these changes, hit the “commit” button.
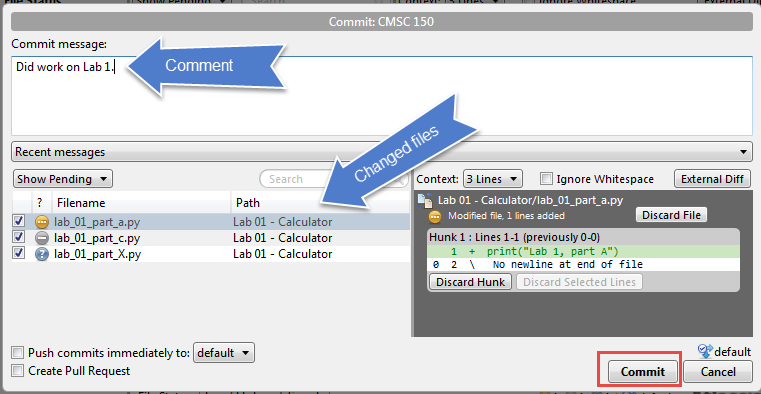
This will bring up a commit dialog box. You can select what files will be
committed, and add a comment. It helps to add a comment so that you can quickly
find changes. I recommend committing each lab and worksheet separately. Once
you've done that, hit “commit.”
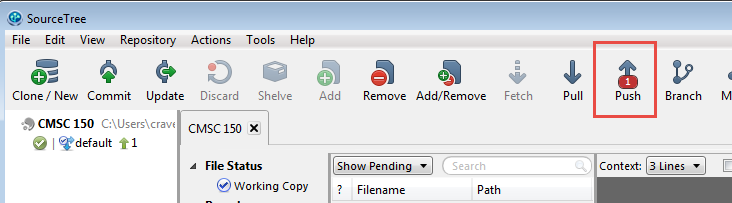
4.6 Pushing Changes to the Server
Commit at many times as you like. Each commit is only on your local computer.
None of them are on BitBucket yet, and no one else can see them. When you are
ready to move all your changes to the server, hit “push.”
4.7 Pulling Changes
If you are only using one computer to code, you can stop here and not worry about pulling changes.
If changes have been done on a different computer, or though the BitBucket website, you need to pull those changes onto your computer. After that you will update to the new code or merge the code in with your own changes.
You can't push to the server until you've pulled down any updates first. This prevents you from overwriting someone else's code.
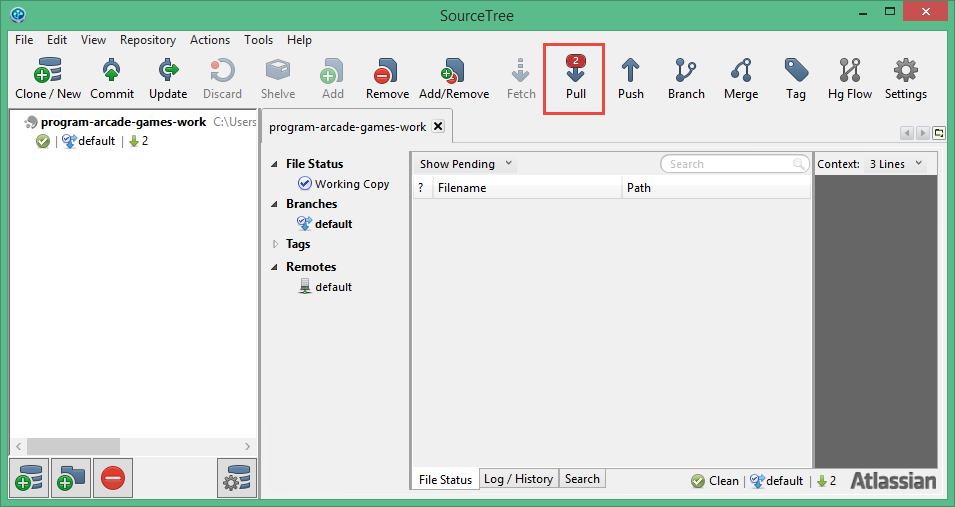
SourceTree will show the number of changes that are waiting to be pulled. In
the figure below there are two changes waiting to be pulled:
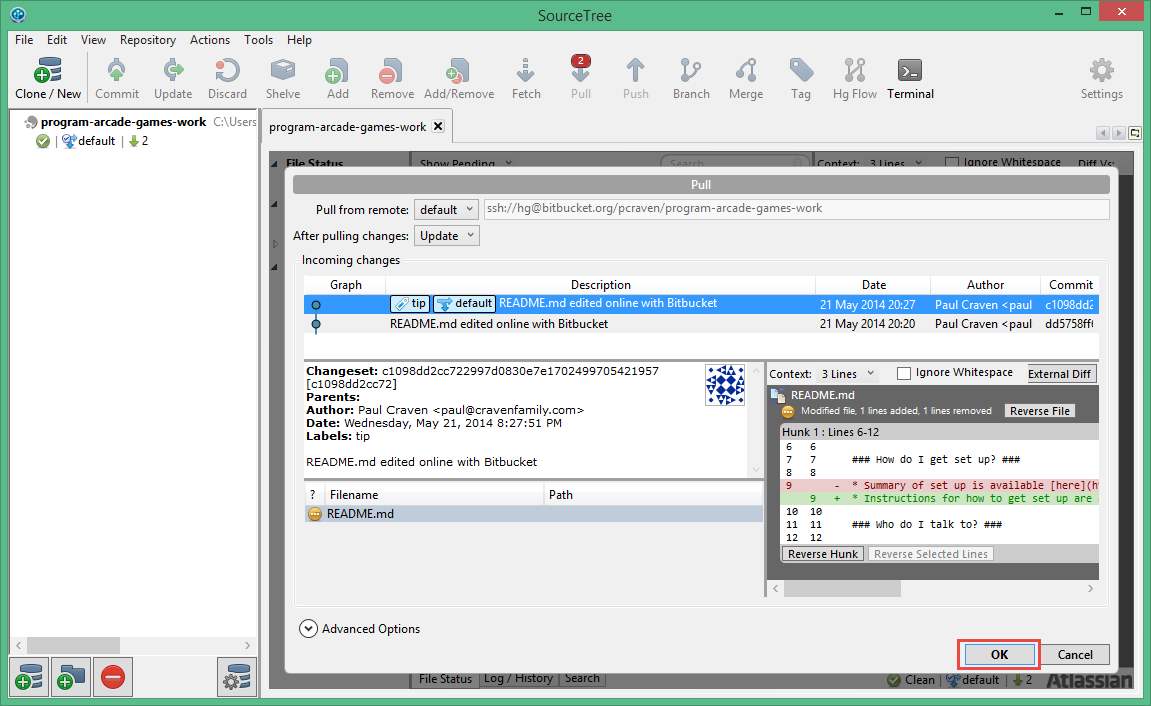
After clicking “pull” you will see a summary of all the changes. Just click
the “ok” button.
After that, you need to may need to merge your changes:
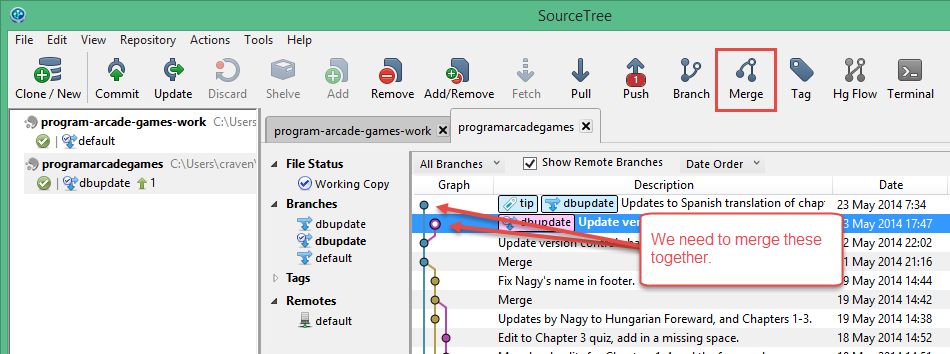
If the same line of code is edited in two different places, SourceTree will step you through manually merging the code.
4.8 Turning In Homework
Once version control has been set up, follow the following steps to complete your homework and turn it in.
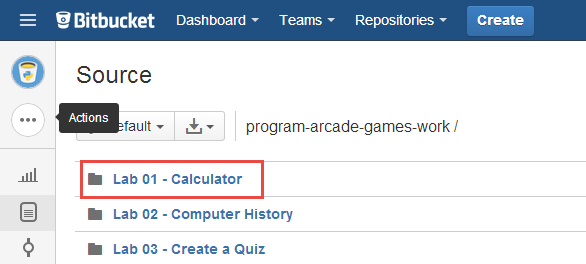
- In the program-arcade-games-work directory you cloned from the version
control system, find the proper file and directory to complete your lab.

- Do the homework.
- Commit the files using SourceTree.
- Push the files using SourceTree.

- Go to BitBucket.org.
- Select your repository.
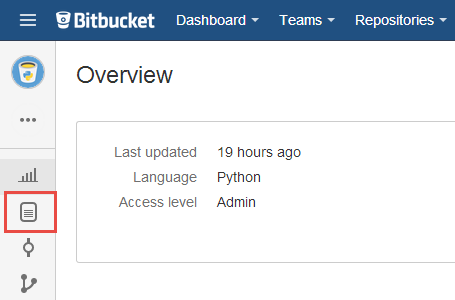
- Click the “Source” icon.
- Find the file or directory with your homework.
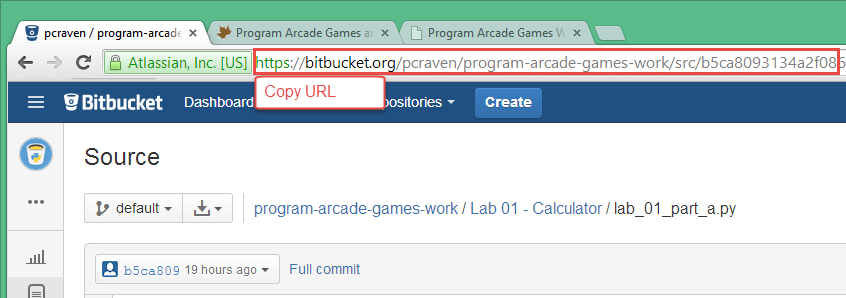
- Copy the URL.
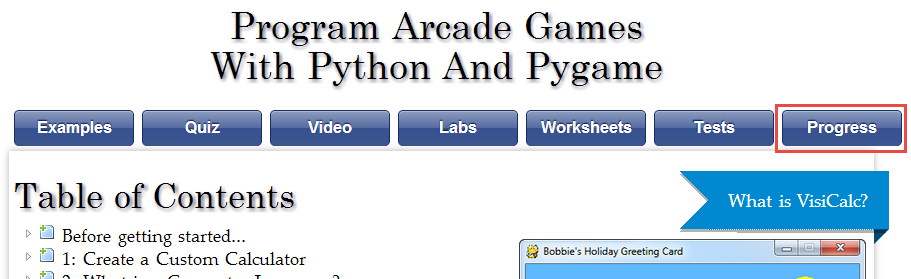
- Go to ProgramArcadeGames.com.
- Click the “Progress” tab.
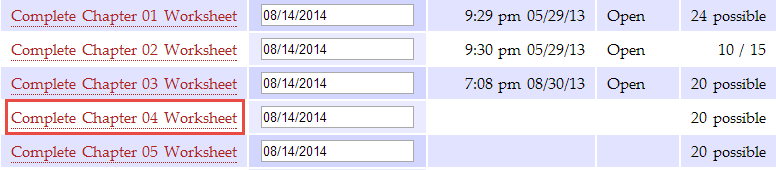
- Find the homework assignment to turn in.
- Paste the URL.
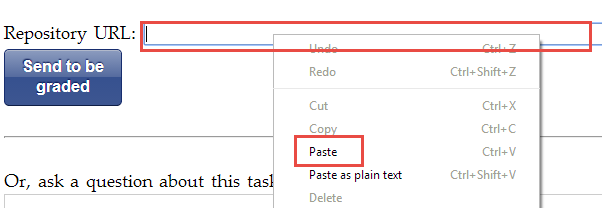
- Click “Send to be graded.”
- Check back later to review your grade.
You are not logged in. Log in here and track your progress.
English version by Paul Vincent Craven
Spanish version by Antonio Rodríguez Verdugo
Russian version by Vladimir Slav
Turkish version by Güray Yildirim
Portuguese version by Armando Marques Sobrinho and Tati Carvalho
Dutch version by Frank Waegeman
Hungarian version by Nagy Attila
Finnish version by Jouko Järvenpää
French version by Franco Rossi
Korean version by Kim Zeung-Il
Chinese version by Kai Lin