Program Arcade GamesWith Python And Pygame
Chapter 16: Array-Backed Grids
16.1 Introduction
Games like minesweeper, tic-tac-toe, and many types of adventure games keep data for the game in a grid of numbers. For example, a tic-tac-toe board:
| O | O | |
| X | ||
| X |
...can use a grid of numbers to represent the empty spots, the O's and the X's like this:
| 0 | 2 | 2 |
| 0 | 1 | 0 |
| 1 | 0 | 0 |
This grid of numbers can also be called a two-dimensional array or
a matrix. (Finally, we get to learn about The Matrix.)
The values of the numbers in the grid represent what should be displayed
at each board location.
In the prior example, 0 represents a
spot where no one has played, a 1 represents an X, and a 2 represents an O.
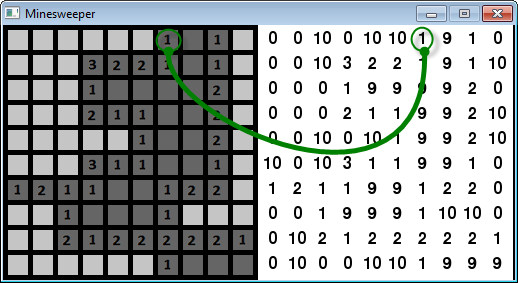
Figure 16.1 is an example from the classic minesweeper game. This example has been modified to show both the classic display on the left, and the grid of numbers used to display the board on the right.
The number 10 represents a mine, the number 0 represents a space that has not been clicked, and the number 9 represents a cleared space. The numbers 1 to 8 represent how many mines are within the surrounding eight squares, and is only filled in when the user clicks on the square.
Minesweeper can actually have two grids. One for the regular display, and a completely separate grid of numbers that will track if the user has placed “flags” on the board marking where she thinks the mines are.
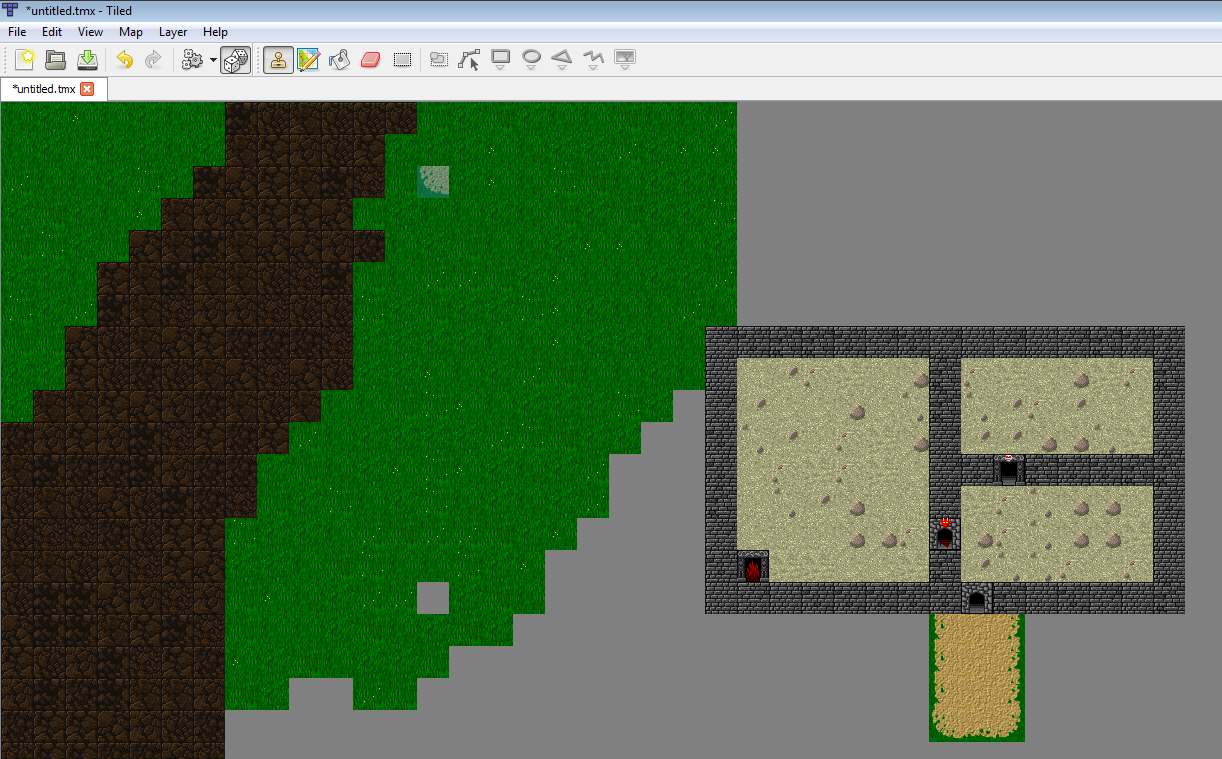
Classic adventure game maps are created using a tiled map editor. These
are huge grids where each
location is simply a number representing the type of terrain that goes there.
The terrain could be things like dirt, a road, a path, green grass, brown grass,
and so forth.
Programs like Tiled Qt
shown in Figure 16.2 allow
a developer to easily make these maps and write the grid to disk.
Adventure games also use multiple grids of numbers, just like minesweeper has a grid for the mines, and a separate grid for the flags. One grid, or “layer,” in the adventure game represents terrain you can walk on; another for things you can't walk on like walls and trees; a layer for things that can instantly kill you, like lava or bottomless pits; one for objects that can be picked up and moved around; and yet another layer for initial placement of monsters.
Maps like these can be loaded in a Python program, but unfortunately a full description of how to manage is beyond the scope of this book. Projects like PyTMX that provide some of the code needed to load these maps.
16.2 Application
Enough talk, let's write some code. This example will create a grid that will trigger if we display a white or green block. We can change the grid value and make it green by clicking on it. This is a first step to a grid-based game like minesweeper, battleship, connect four, etc. (One year I had a student call me over and she had modified a program like this to show my name in flashing lights. That was . . . disturbing. So please use this knowledge only for good!)
Go to the example code page
and download the base template file:
ProgramArcadeGames.com/python_examples/f.php?file=pygame_base_template.py
Starting with the blank template file, attempt to recreate this program following the instructions here. The final program is at the end of this chapter but don't skip ahead and copy it! If you do that you'll have learned nothing. Anyone can copy and paste the code, but if you can recreate this program you have skills people are willing to pay for. If you can only copy and paste, you've wasted your time here.
16.2.1 Drawing the Grid
- Adjust the program's window size to 255x255 pixels.
- Create variables named width, height, and margin. Set the width and height to 20. This will represent how large each grid location is. Set the margin to 5. This represents the margin between each grid location and the edges of the screen. Create these variables before the main program loop.
- Draw a white box in the upper left corner. Draw the box drawn using the height
and width variables created earlier. (Feel free to adjust the colors.)
When you get done your program's window should look like Figure 16.3.
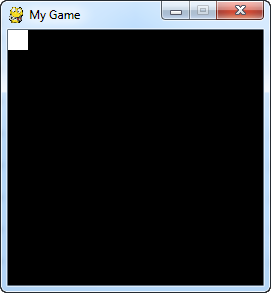
Figure 16.3: Step 3 - Use a for loop to draw 10 boxes in a row. Use column for the
variable name in the for loop. The output will look like one long box until
we add in the margin between boxes.
See Figure 16.4.
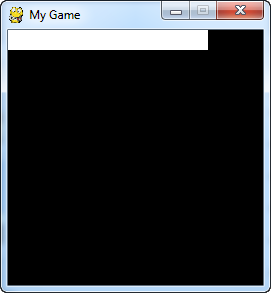
Figure 16.4: Step 4 - Adjust the drawing of the rectangle to add in the margin variable.
Now there should be gaps between the rectangles.
See Figure 16.5.

Figure 16.5: Step 5 - Add the margin before drawing the rectangles, in addition to between each rectangle.
This should keep the box from appearing right next to the window edge.
See Figure 16.6.
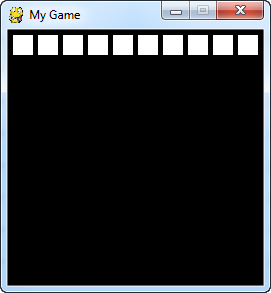
Figure 16.6: Step 6 - Add another for loop that also will loop for each row. Call the variable
in this for loop row. Now we should have a full grid of boxes.
See Figure 16.7.
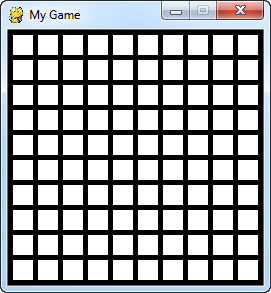
Figure 16.7: Step 7 16.2.2 Populating the Grid
- Now we need to create a two-dimensional array.
Creating a two-dimensional array in Python is, unfortunately, not as
easy as it is in some other computer languages.
There are some libraries that can be downloaded for Python that
make it easy, but for this example they will not be used. To create a two-dimensional array and set an
example, use the code below:
# --- Create grid of numbers
# Create an empty list
grid = []
# Loop for each row
for row in range(10):
    # For each row, create a list that will
    # represent an entire row
    grid.append([])
    # Loop for each column
    for column in range(10):
        # Add a the number zero to the current row
        grid[row].append(0)
A much shorter example is below, but this example uses some odd parts of Python that I don't bother to explain in this book:
grid = [[0 for x in range(10)] for y in range(10)]
Use one of these two examples and place the code to create our array ahead of your main program loop.
- Set an example location in the array to 1.
Two dimensional arrays are usually represented addressed by first their row, and then the column. This is called a row-major storage. Most languages use row-major storage, with the exception of Fortran and MATLAB. Fortran and MATLAB use column-major storage.
# Set row 1, column 5 to one
grid[1][5] = 1
Place this code somewhere ahead of your main program loop.
- Select the color of the rectangle based on the value of a variable named color. Do this by first finding the line of code where the rectangle is drawn. Ahead of it, create a variable named color and set it equal to white. Then replace the white color in the rectangle declaration with the color variable.
- Select the color based on the value in the grid. After setting color to white, place
an if statement that looks at the value in grid[row][column] and changes the
color to green if the grid value is equal to 1. There should now be one
green square.
See Figure 16.8.
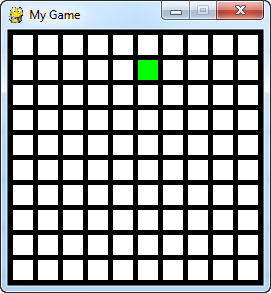
Figure 16.8: Step 11 - Print “click” to the screen if the user clicks the mouse button. See
bitmapped_graphics.py for example code of how to detect a mouse click. - Print the mouse coordinates when the user clicks the mouse.
See move_mouse.py for an example on getting the position of the mouse. See Figure 16.9.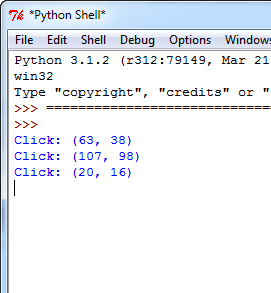
Figure 16.9: Step 13 - Convert the mouse coordinates into grid coordinates. Print those instead. Remember to
use the width and height of each grid location combined with the margin. It will be necessary
to convert the final value to an integer. This can be done by using int or by using
the integer division operator // instead of the normal division operator /.
See Figure 16.10.
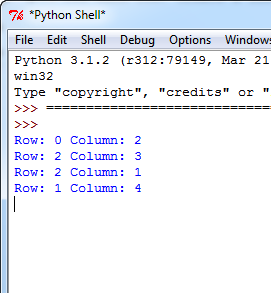
Figure 16.10: Step 14 - Set the grid location at the row/column clicked to 1.
See Figure 16.11.
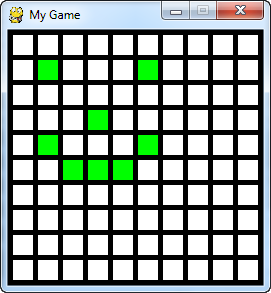
Figure 16.11: Step 15
16.2.3 Final Program
"""
 Example program to show using an array to back a grid on-screen.

 Sample Python/Pygame Programs
 Simpson College Computer Science
 http://programarcadegames.com/
 http://simpson.edu/computer-science/

 Explanation video: http://youtu.be/mdTeqiWyFnc
"""
import pygame

# Define some colors
BLACK = (0, 0, 0)
WHITE = (255, 255, 255)
GREEN = (0, 255, 0)
RED = (255, 0, 0)

# This sets the WIDTH and HEIGHT of each grid location
WIDTH = 20
HEIGHT = 20

# This sets the margin between each cell
MARGIN = 5

# Create a 2 dimensional array. A two dimensional
# array is simply a list of lists.
grid = []
for row in range(10):
    # Add an empty array that will hold each cell
    # in this row
    grid.append([])
    for column in range(10):
        grid[row].append(0)  # Append a cell

# Set row 1, cell 5 to one. (Remember rows and
# column numbers start at zero.)
grid[1][5] = 1

# Initialize pygame
pygame.init()

# Set the HEIGHT and WIDTH of the screen
WINDOW_SIZE = [255, 255]
screen = pygame.display.set_mode(WINDOW_SIZE)

# Set title of screen
pygame.display.set_caption("Array Backed Grid")

# Loop until the user clicks the close button.
done = False

# Used to manage how fast the screen updates
clock = pygame.time.Clock()

# -------- Main Program Loop -----------
while not done:
    for event in pygame.event.get():  # User did something
        if event.type == pygame.QUIT:  # If user clicked close
            done = True  # Flag that we are done so we exit this loop
        elif event.type == pygame.MOUSEBUTTONDOWN:
            # User clicks the mouse. Get the position
            pos = pygame.mouse.get_pos()
            # Change the x/y screen coordinates to grid coordinates
            column = pos[0] // (WIDTH + MARGIN)
            row = pos[1] // (HEIGHT + MARGIN)
            # Set that location to one
            grid[row][column] = 1
            print("Click ", pos, "Grid coordinates: ", row, column)

    # Set the screen background
    screen.fill(BLACK)

    # Draw the grid
    for row in range(10):
        for column in range(10):
            color = WHITE
            if grid[row][column] == 1:
                color = GREEN
            pygame.draw.rect(screen,
                             color,
                             [(MARGIN + WIDTH) * column + MARGIN,
                              (MARGIN + HEIGHT) * row + MARGIN,
                              WIDTH,
                              HEIGHT])

    # Limit to 60 frames per second
    clock.tick(60)

    # Go ahead and update the screen with what we've drawn.
    pygame.display.flip()

# Be IDLE friendly. If you forget this line, the program will 'hang'
# on exit.
pygame.quit()
and start work on your own video game!
16.2.4 Multiple Choice Quiz
Click here for a multiple-choice quiz.
16.2.5 Short Answer Worksheet
Click here for the chapter worksheet.
English version by Paul Vincent Craven
Spanish version by Antonio Rodríguez Verdugo
Russian version by Vladimir Slav
Turkish version by Güray Yildirim
Portuguese version by Armando Marques Sobrinho and Tati Carvalho
Dutch version by Frank Waegeman
Hungarian version by Nagy Attila
Finnish version by Jouko Järvenpää
French version by Franco Rossi
Korean version by Kim Zeung-Il
Chinese version by Kai Lin